How Do I Make Biltong: A Complete Guide for 2026
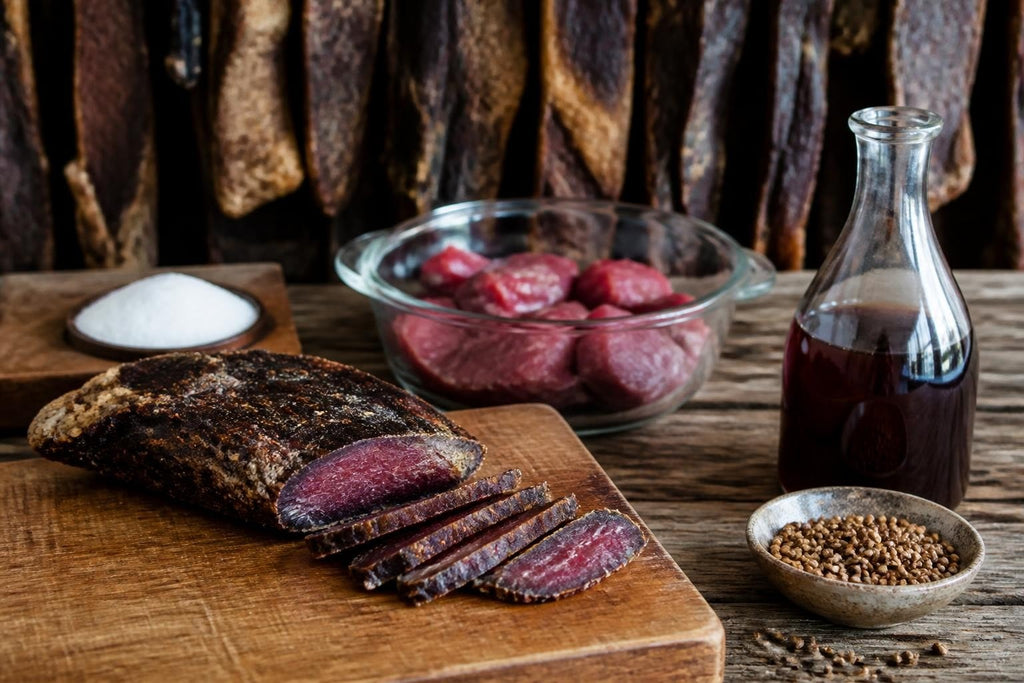
Making biltong at home connects you to centuries of South African tradition while creating one of the world's most distinctive preserved meat products. Whether you're a South African living in New Zealand craving that familiar taste from home or simply curious about this air-dried delicacy, understanding how do i make biltong properly ensures both safety and authenticity. This comprehensive guide walks through every step of the traditional biltong-making process, from selecting the right cuts of meat through to achieving that perfect texture and flavour that makes biltong such a beloved snack.
Understanding Biltong and Its Cultural Significance
Biltong represents more than just dried meat in South African food culture. This traditional preservation method dates back centuries, originally developed by indigenous peoples and refined by Dutch settlers who needed to preserve meat during long treks across the African landscape.
The term "biltong" comes from the Dutch words "bil" (rump) and "tong" (strip), though modern biltong incorporates various cuts. Unlike jerky, which is typically smoked and includes sugar, biltong relies on vinegar, salt, and spices before air-drying at cool temperatures. This creates a distinctly different flavour profile and texture.
For South Africans living abroad, particularly those who've relocated to New Zealand, biltong evokes powerful memories of home. The unique taste cannot be replicated by local products, which explains why many expatriates either make their own or seek authentic versions from specialised retailers.
Selecting the Right Meat for Biltong
Best Cuts for Traditional Biltong
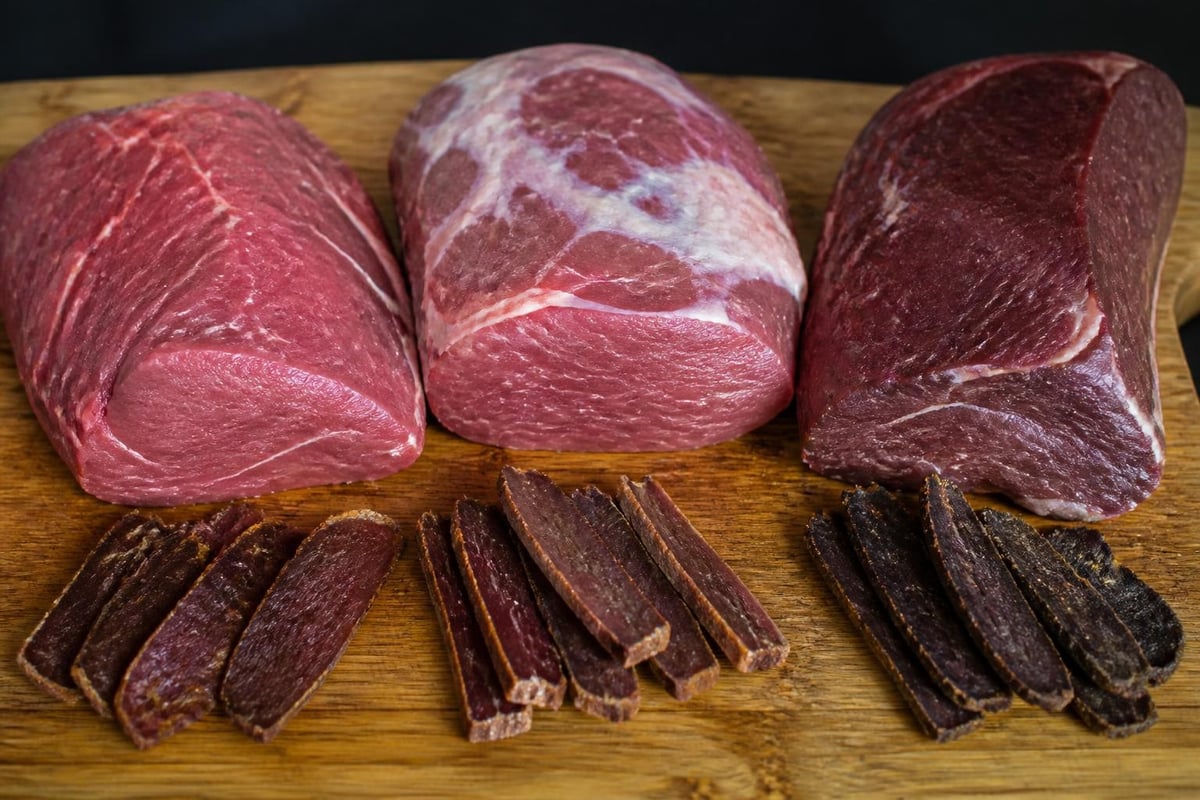
The foundation of quality biltong starts with proper meat selection. Lean cuts work best because excessive fat can turn rancid during the drying process.
Recommended beef cuts:
- Silverside (topside)
- Rump
- Sirloin
- Fillet (for premium biltong)
- Eye of round
Silverside remains the most popular choice among traditional biltong makers due to its lean composition and relatively affordable price point. The meat should be fresh, never frozen if possible, and sourced from reputable butchers who understand you're making biltong.
Game Meat and Alternative Options
While beef dominates the biltong landscape, game meats create exceptional variations:
- Venison: Produces lean, flavourful biltong
- Kudu: A South African favourite with rich taste
- Ostrich: Extremely lean and healthy option
- Springbok: Creates delicate, refined biltong
Game meats typically dry faster due to lower fat content and offer distinctive flavours that many connoisseurs prefer over beef.
Essential Equipment and Ingredients
Equipment Checklist
Making biltong requires minimal but specific equipment. You don't need expensive commercial dryers to produce excellent results at home.
| Equipment | Purpose | Notes |
|---|---|---|
| Sharp knife | Cutting meat with the grain | Crucial for proper texture |
| Large glass or ceramic bowl | Marinating | Avoid reactive metals |
| Biltong box or drying cabinet | Air circulation and drying | Can be DIY or purchased |
| Hooks or S-hooks | Hanging meat strips | Stainless steel preferred |
| Fan (40W minimum) | Air circulation | Essential for consistent drying |
| Light bulb (40-60W) | Gentle heat | Optional but speeds drying |
A biltong box can be constructed from wood with mesh or ventilation holes, or you can purchase purpose-built units. The key requirements are adequate airflow, protection from insects, and consistent temperature control.
Core Ingredients and Spices
Traditional biltong uses a relatively simple spice blend that allows the meat's natural flavour to shine through.
Essential ingredients:
- Coarse rock salt or sea salt
- Brown vinegar (traditional) or apple cider vinegar
- Black pepper (coarsely ground)
- Coriander seeds (toasted and crushed)
Optional additions:
- Worcestershire sauce
- Brown sugar (small amounts)
- Garlic powder
- Chilli flakes
- Bicarbonate of soda (for tenderising)
The beauty of homemade biltong lies in adjusting spice ratios to personal preference. Some families guard their spice blend recipes for generations, passing them down as culinary heirlooms. If you're in New Zealand and missing authentic South African spices, Something From Home stocks traditional ingredients that ensure your biltong tastes exactly as it should.
The Complete Biltong-Making Process
Step 1: Preparing and Cutting the Meat
Proper meat preparation dramatically impacts the final product's texture and drying time. Remove all visible fat and sinew, as these don't dry properly and can spoil.
- Cut meat with the grain into strips 2-4 cm thick
- Maintain consistent thickness throughout each strip
- Length can vary (15-30 cm typical)
- Thinner strips dry faster; thicker produces more tender biltong
Cutting with the grain (not against it, as with steak) creates the characteristic biltong texture that tears into fibres when eaten. This fundamental difference distinguishes biltong from other dried meat products.
Step 2: The Vinegar Bath
The vinegar bath serves multiple purposes: it adds flavour, begins the preservation process, and creates the slightly acidic environment that inhibits bacterial growth. According to research on biltong processing, the marinade components play a crucial role in pathogen reduction.
Standard vinegar process:
- Submerge meat strips completely in brown or apple cider vinegar
- Leave for 15-30 minutes (not longer, as meat becomes too soft)
- Remove and shake off excess vinegar
- Pat dry with paper towels
Some biltong makers dilute vinegar with water (50:50 ratio) for milder flavour. The vinegar scent dissipates during drying, leaving only a subtle tang.
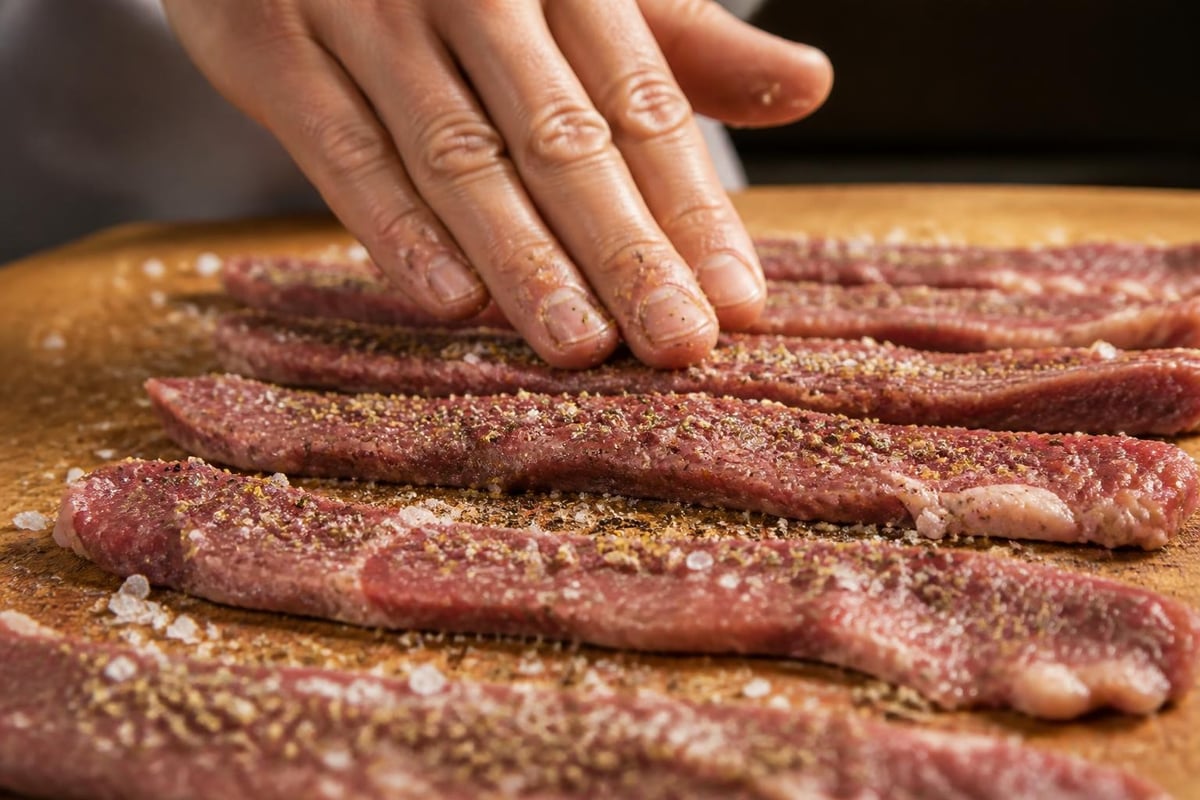
Step 3: Applying the Spice Mix
This stage determines your biltong's flavour profile. Work methodically to ensure even coverage.
Traditional application method:
- Lay meat strips on a clean surface
- Sprinkle coarse salt generously over all surfaces
- Apply cracked coriander and black pepper
- Press spices into the meat
- Ensure all surfaces are well-coated
- Layer strips in a container for 2-4 hours (refrigerated)
The salt draws out moisture while beginning the curing process. Understanding safe meat curing practices helps home biltong makers avoid common pitfalls related to inadequate salt penetration or unsafe drying conditions.
Step 4: Hanging and Initial Drying
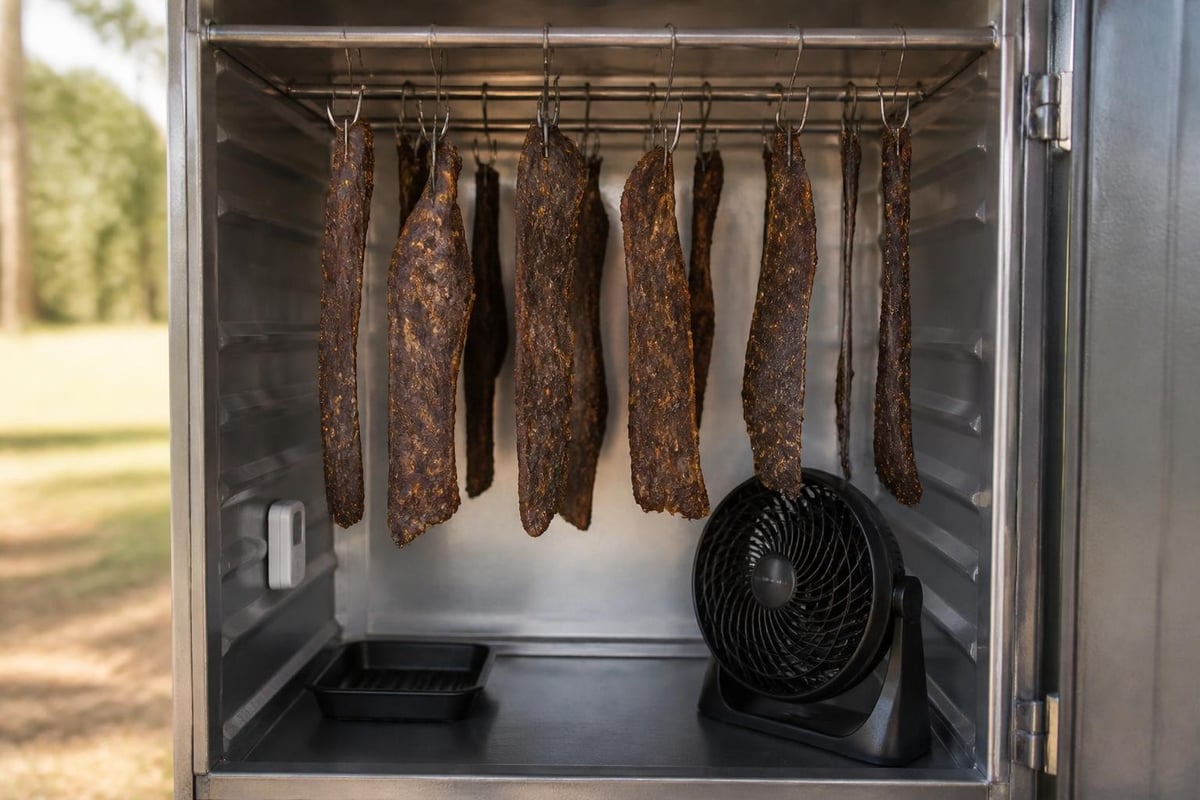
After the curing period, the actual drying phase begins. This step requires patience and proper environmental control.
- Rinse off excess spices if desired (some prefer leaving them on)
- Pat meat dry with paper towels
- Pierce one end of each strip and thread through hooks
- Hang in biltong box ensuring strips don't touch
- Activate fan for constant airflow
- Monitor temperature: ideal range 18-25°C
Adequate spacing between strips allows air to circulate around all surfaces. Touching strips create moisture pockets where bacteria can proliferate.
Step 5: Monitoring the Drying Process
Biltong typically requires 3-7 days to reach optimal dryness, depending on thickness, humidity, and temperature. Many South Africans living in New Zealand find the cooler climate actually benefits biltong making, as excessive heat can cause the exterior to case-harden while the interior remains moist.
Drying milestones:
- Day 1-2: Meat surface dries, colour darkens
- Day 3-4: Strips become firmer, weight reduces noticeably
- Day 5-7: Desired texture achieved (varies by preference)
Testing doneness involves squeezing the thickest part. It should feel firm but slightly yielding, not rock-hard. Some prefer wetter biltong; others like it completely dried. The scientific review of biltong processing provides detailed parameters for water activity and pH that ensure microbiological safety.
Critical Safety Considerations
Temperature and Humidity Control
Food safety cannot be compromised when making biltong at home. The FSIS guidance on dried products outlines control points relevant to safe biltong production.
Critical parameters:
| Factor | Safe Range | Why It Matters |
|---|---|---|
| Temperature | 18-25°C | Prevents bacterial growth |
| Humidity | 40-60% | Ensures proper drying rate |
| Airflow | Continuous | Removes moisture, prevents mould |
| Initial pH | <5.3 | Inhibits pathogens |
New Zealand's climate varies significantly by region. Auckland's humidity requires more vigorous air circulation, while Canterbury's drier conditions may speed the process. Adjust your setup accordingly.
Recognising Spoilage
Despite proper technique, occasionally batches can fail. Recognise warning signs immediately:
- Unpleasant, sour smell (different from normal fermented aroma)
- Visible mould (white, green, or black spots)
- Slimy texture on the surface
- Excessive moisture pooling in the box
When in doubt, discard questionable pieces. The relatively low cost of meat doesn't justify health risks. Understanding principles of safe dry-curing helps prevent these issues before they occur.
Troubleshooting Common Biltong Problems
Issue: Case Hardening
Problem: Exterior dries too quickly, trapping moisture inside.
Solution: Lower temperature, increase humidity slightly, or apply less heat. Case-hardened biltong develops mould in the wet interior despite appearing dry outside.
Issue: Mould Development
Problem: White or coloured mould appears during drying.
Causes and fixes:
- Insufficient airflow → increase fan strength
- High humidity → add heat source or desiccant
- Strips touching → ensure proper spacing
- Contaminated equipment → sterilise thoroughly
Surface mould early in the process can sometimes be wiped with vinegar, but internal mould requires discarding the batch.
Issue: Too Salty or Spicy
Problem: Final product overwhelming in flavour.
Prevention: Reduce salt and spice quantities, rinse meat more thoroughly after curing, or shorten the curing time before hanging.
Issue: Inconsistent Texture
Problem: Some pieces perfect, others too dry or too wet.
Causes: Uneven thickness, inconsistent air circulation, or varying fat content. Cut more uniformly and rotate hanging positions during drying.
Storage and Serving Biltong
Proper Storage Methods
Once biltong reaches your preferred dryness, proper storage extends shelf life and maintains quality.
Short-term storage (1-2 weeks):
- Brown paper bags
- Breathable cloth bags
- Cool, dry cupboard
Long-term storage (several months):
- Vacuum-sealed bags (refrigerated)
- Freezer storage (up to 12 months)
- Commercial biltong boxes with controlled environment
Never store biltong in airtight containers unless vacuum-sealed, as trapped moisture encourages mould growth. Some moisture loss continues even during storage, which many consider desirable as it concentrates flavours.
Serving Suggestions and Culinary Uses
Traditional biltong consumption involves slicing thin pieces and eating as a snack, but creative applications abound:
- Sliced thin for traditional snacking
- Shaved onto salads for protein boost
- Chopped into scrambled eggs or omelettes
- Ground into biltong powder for seasoning
- Paired with cheese, crackers, and wine
The versatility of biltong makes it suitable for everything from sophisticated charcuterie boards to simple road-trip sustenance. South Africans in New Zealand often serve biltong at gatherings, introducing Kiwi friends to this unique delicacy.
Regional Variations and Modern Adaptations
Traditional vs Modern Methods
While purists insist on traditional methods, modern adaptations address contemporary concerns and convenience:
Traditional approach:
- Natural air-drying only
- Minimal temperature control
- Simple spice blends
- Extended drying times
Modern adaptations:
- Electric biltong boxes with precise controls
- Dehydrators (though results differ)
- Flavoured variations (chilli, garlic, peri-peri)
- Accelerated drying techniques
Neither approach is inherently superior. Traditional methods produce classic flavour profiles, while modern techniques offer consistency and convenience. Many experienced makers blend both approaches.
Creative Flavour Profiles
Beyond traditional coriander-pepper combinations, contemporary biltong makers experiment with diverse seasonings:
- Peri-peri: Chilli-based Portuguese-African fusion
- BBQ-style: Incorporating paprika and brown sugar
- Garlic and herb: Mediterranean-inspired variations
- Teriyaki: Asian-influenced sweet-savoury profile
These innovations appeal to broader audiences while maintaining biltong's fundamental character. When experimenting, start with small batches to test flavour combinations before committing larger quantities of meat.
Why South Africans in New Zealand Make Their Own Biltong
The South African diaspora in New Zealand faces a unique challenge: access to authentic comfort foods from home. While commercial biltong is available, nothing quite matches the taste and satisfaction of homemade batches made exactly to family specifications.
Reasons expatriates make biltong:
- Authenticity: Control over every ingredient ensures traditional taste
- Cost-effectiveness: Commercial biltong commands premium prices
- Cultural connection: The process itself evokes memories and traditions
- Customisation: Personal preference for wetness, spice levels, cuts
- Community: Sharing with fellow South Africans strengthens bonds
Making biltong becomes a ritual that temporarily transports people back to braais in the Karoo or coastal holidays in Durban. The familiar smells filling a New Zealand kitchen bridge continents and generations.
For those times when making biltong isn't practical, or when you need authentic South African ingredients to get started, visiting a specialised South African food store provides access to everything from proper spices to ready-made biltong when your own batch is still hanging.
Legal and Regulatory Considerations in New Zealand
Import Restrictions and Homemade Production
New Zealand maintains strict biosecurity regulations regarding meat products. Understanding these rules prevents legal complications:
Key regulations:
- Commercial sale: Requires proper licensing and facility registration
- Personal consumption: Generally unrestricted in private homes
- Gifting: Legal but cannot involve commercial transaction
- Import: Heavily restricted; bringing biltong from South Africa often prohibited
Making biltong at home for personal and family consumption remains legal and unregulated provided basic food safety standards are maintained. Never attempt to commercialise home production without proper licensing, as penalties for unlicensed meat processing are substantial.
Ensuring Compliance with Food Safety Standards
Though home biltong making doesn't require registration, following recognised food safety principles protects your household. New Zealand's generally cooler climate actually benefits biltong production compared to South Africa's often hotter conditions, reducing some pathogen risks.
Best practices:
- Source meat from reputable, licensed butchers
- Maintain clean equipment and work surfaces
- Follow temperature and humidity guidelines
- Keep detailed notes on batch dates and conditions
- When uncertain, consult food safety resources
Equipment Deep Dive: Building vs Buying
DIY Biltong Box Construction
Many enthusiasts construct their own biltong boxes from readily available materials. Basic carpentry skills and simple tools suffice for functional designs.
Materials needed:
- Plywood or pine boards (untreated)
- Mesh or wire screen for ventilation
- Computer fan (12V) with power adapter
- Light bulb socket and 40-60W bulb
- Hooks or dowels for hanging
- Hinges and latch for door
Construction steps:
- Build rectangular box (60cm × 40cm × 80cm typical)
- Install ventilation mesh on top and bottom
- Mount fan at bottom for upward airflow
- Add bulb socket at bottom for gentle heat
- Install hanging dowels or hooks near top
- Create hinged door for access
Total cost typically ranges from NZD 50-150 depending on materials and existing tool availability. Online South African communities in New Zealand often share detailed plans and construction tips.
Commercial Biltong Box Options
For those preferring ready-made solutions, commercial biltong boxes offer convenience and consistent results. These range from basic designs to sophisticated units with digital controls.
| Feature | Basic Model | Premium Model |
|---|---|---|
| Price range | NZD 150-300 | NZD 400-800+ |
| Temperature control | Fixed/manual | Digital thermostat |
| Capacity | 2-5 kg | 5-15 kg |
| Automation | Manual monitoring | Set-and-forget |
| Build quality | Functional | Commercial-grade |
Consider batch size requirements, available space, and budget when choosing between DIY and commercial options. Many serious biltong makers eventually upgrade from homemade boxes to commercial units as their production increases.
Making your own biltong connects you to South African heritage while providing a delicious, protein-rich snack perfectly suited to New Zealand's active lifestyle. Whether you're recreating childhood memories or exploring traditional preservation methods for the first time, understanding how do i make biltong properly ensures both safety and satisfaction. When you need authentic South African ingredients, spices, or simply want to enjoy ready-made biltong while your batch dries, Something From Home offers New Zealand's most comprehensive range of South African products, bringing a taste of home to Kiwi kitchens throughout the country.